Additional Message Per Appointment Type
Do you need your clients to know certain information per appointment type? Don’t worry, we’ve got you covered! Just follow the next steps.
Step 1: Log into your Nimblr account.
Step 2: Go to the Self-Scheduling tab.
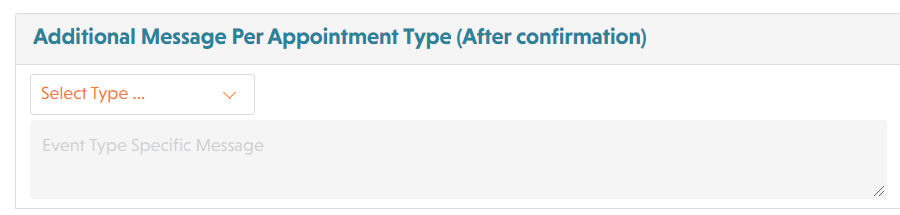
Step 3: Scroll down until you find Additional Message Per Appointment Type (After confirmation). You can select the appointment type that needs special instructions and add them.
For more questions and information, please contact support@nimblr.ai. We will be happy to help you 🙂