3: Set Self Scheduling in multiple channels: Increase revenue and allow patients to schedule 24/7
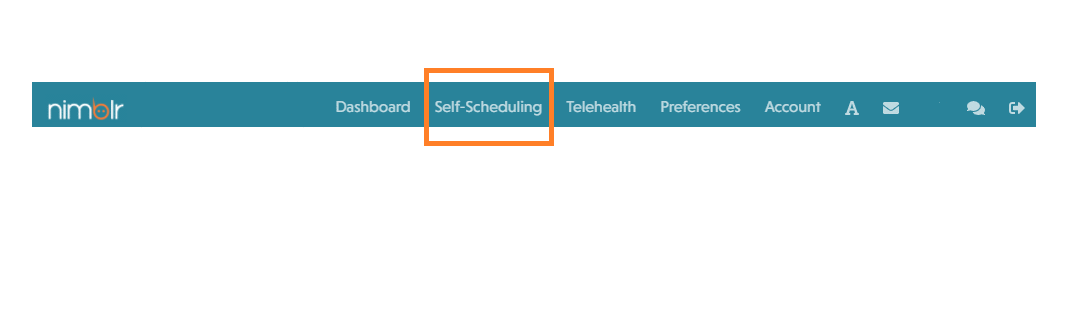
Before we start, enable this preference. Go to the Self Scheduling tab (second option in the top blue bar), enable it, and follow the 3 steps on the page (described below).
*Don’t worry, nothing will happen until you finish your settings. You are in good hands.
Step 1. Enable your locations and calends
In the first section, customize your URL by editing the hashtag field. i.e. if you set your hashtag to #drsmith, your URL will be: https://ui.nimblr.ai/self/4565/drsmith
Enable this location by clicking on the green switch.
Select the calendar that will be available for Holly to insert new appointments. *If you only have 1 please skip this step.
Select the appointment types available for this location.
*Heads up! If you share your personalized URL and then you change your # your previous URL will get updated and the previous one won’t work anymore.
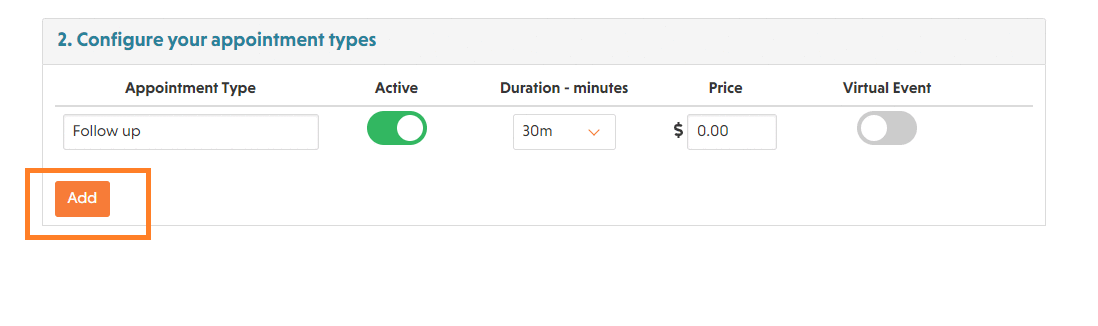
Step 2. Configure your appointment types
Insert the appt types you will offer to your patients, you can add as many as you want.
Enable the appt types by clicking on the green switch. You can disable any appt type at any time.
Set a duration
Set the price (this field IS OPTIONAL. If you have $0, Holly won’t send anything)
Enable the ones that will be telehealth.
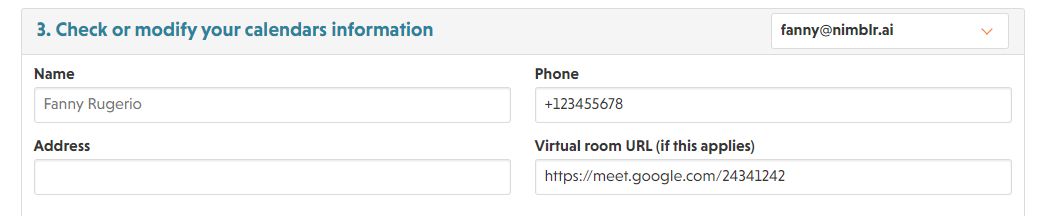
Step 3. Check or modify your calendars information (optional)
You can always just double-check your basic information like your practice name and/or your physical address.
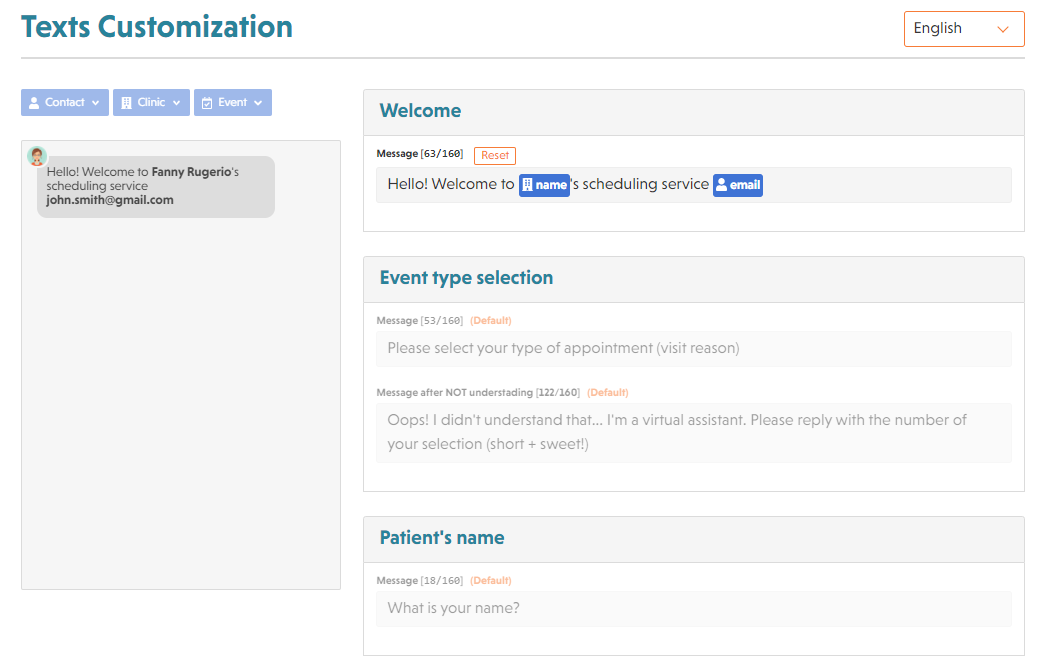
Step 4. Texts Customization
In this section, you will be able to modify the customed texts your customers will see, we have already filled the basic information/texts for you, if you want to modify them it’s very simple just locate in the text you want to modify and start to type.
On the left side, you will see a preview of the texts, this will be how your customers will see them.
You are all set! Start spreading your self-scheduling in all your social networks!
Start sharing your self-scheduling link in all your social media! Check these quick guides to know how to configure it in all your social media channels like Facebook, Instagram, Facebook messenger, Google Maps…